


1950 Ford 8N Tractor, s/n 8N249439 (page 2)
Page 1 | Page 2 | Page 3 | Page 4 | Page 5
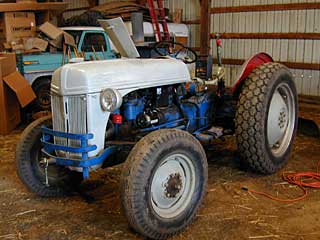
Before (2002):
May 12, 2008
Wire wheeled and painted the front axle, axle support, and remaining radius arm. Very satisfying to be at this point with these pieces. The stuck pins were one of the main reasons this project sat untouched for so long.


May 13, 2008
Pressed the axle bushing in, bolted up the support, and installed the axle. Wirebrushed the steering assembly and installed that, too. Layed out the rest of the parts which need wirewheeling, paint and installation before I can put the final red coat on.

May 14, 2008
Primed the brake drums.
May 19, 2008
Primed the left outer axle assembly:

May 20, 2008
Painted the muffler, exhaust manifold and hardware with hi-temp paint, and painted the bottom of the seat gloss black. Also mounted the left outer axle, and temporarily bolted the hydraulic pump side covers in place:


May 21, 2008
Painted the top side of the seat black.
May 22, 2008
Cleaned and primed the right outer axle, plus set up the electrolysis tank to do some larger parts, some for the second time, since they've rusted up since I did them the first time.


May 24, 2008
Pulled the front bumper and seat spring out of the electrolysis tank, pressure washed 'em, sprayed some phosphoric acid on them, wiped them dry, and later on, wire brushed and primed them before installing the right outer axle and bumper, and putting the spring aside for a coat of black paint.

Reset the electrolysis tank and put one of the rear wheel centers in it to start cooking.
Also wire brushed and primed the running boards. Had to cold chisel the rotted 'pocket' under the right board that originally held a sheet of asbestos insulation (the muffler runs right underneath it).


May 26, 2008
Primed the top sides of the running boards, and rattlecanned some black on the seat spring, and while all that was drying, took my bride out to breakfast.
Came back, and pulled the first rear wheel center out of the e-tank, pressure washed, phosporic acided (is that a word?), and set it aside until the other center is cooked.
Then turned my attention to torquing all the case-to-case bolts, and topped off the steering sector sump with 90W, and then went ahead and installed the running boards:

Didn't feel quite ready to tackle the lift assembly at that point, so I did some organizing and straightening, and separated out all the parts still needing cleaning and priming from other stuff that just gets cleaned up and bolted on:

(still quite a daunting pile)

(my own personal NAPA store, complete with three starters to choose from)
Then decided it was time to try out the Ford Grey (gray) paint on the underside of the hood. I didn't like the shade, and tried to modify it by adding some yellow. It's closer, but I think I'll need to add some black to bring it down closer to the original grey:

Once I get it "close enough," all the rest of the sheet metal is ready to be sprayed (I brushed the underside of the hood, since it was more for color test, and won't be visible).
Finally, I took the hydro pump out of the lift assembly, removed the control arm where I could get in and work on cleaning the insides a little better, and after about two hours work, got some primer on it:

The link on the spring is rust welded, and won't unscrew. I'll try it again once everything's bolted up, but don't give it much hope.
Oh, and since I pulled the cylinder, I've gotta order a new gasket for it, so I'm stopped dead for the moment (will work on painting grey parts for now). Also noticed my cam is worn down a bit - may try brazing it to build it back up and grind it down smooth...
May 27, 2008
Pulled the second rear wheel center out of the e-tank, and got it prepped and ready for wire-wheeling prior to primer.

Put primer on the underside of the lift assembly, and also attempted to build up the lift follow cam by brazing it (it was worn down a bit), but couldn't get the heavy cast iron hot enough for the rod to stick. It'll just have to be worn.
Finished up by tinting the grey paint I had bought a couple years ago to match the original 1950 grey color, and got reasonably close to it. However, didn't have as much luck with the red paint - it turned out more tomato red than what I wanted. I may bite the bullet and order another gallon from a source which claims to exactly match the original red.
My tinted color is inbetween the two reds - hard to tell from the pic, but once it dries, it should be pretty close to a part I used for comparison which still had some original grey on it.

May 29, 2008
Drove down to John Smith's and bought a NOS draft control spring from him. Really nice guy, and makes you just sick to see the top notch quality of his restorations. Something to shoot for on the next project… You can see the spring I ruined in the photo above the wrench- springs don't like high heat!

While in town, picked up some Rustoleum Sunrise Red paint, which turns out to be a very good match to the original red color I found inside my air cleaner. Painted the governor red, as well as the steering assembly:

Pulled the battery tray and fan out of the e-tank, and have them ready for wirebrush and prime. Put some more parts in the tank to cook, and then wirebrushed and primed one side of one of the rear wheel centers.

Also set up a hanger to hold the parts that will be painted grey, hopefully in a few days. I decided I need to wet sand them before painting, to take out some of the worse runs and drips. Not many people can claim to have used a WWI biplane as part of a paint booth.

May 30, 2008
More prep work tonight… Finished primering the first rear wheel center, and had my son do the first side of the second center:

Meanwhile, I primed all the bolt heads on the tractor frame, plus jiggered new bolts in the brake pedals where I had to drill them out way back when. Also got the dash and dash support painted red:


All the tin will have to be sanded to get rid of the brush marks from when I did the primer, and they will then be ready to paint all at one time. The tractor frame is also about ready for the red topcoat.
June 2, 2008
Painted the frame red (first coat).

